Tangled Fingers
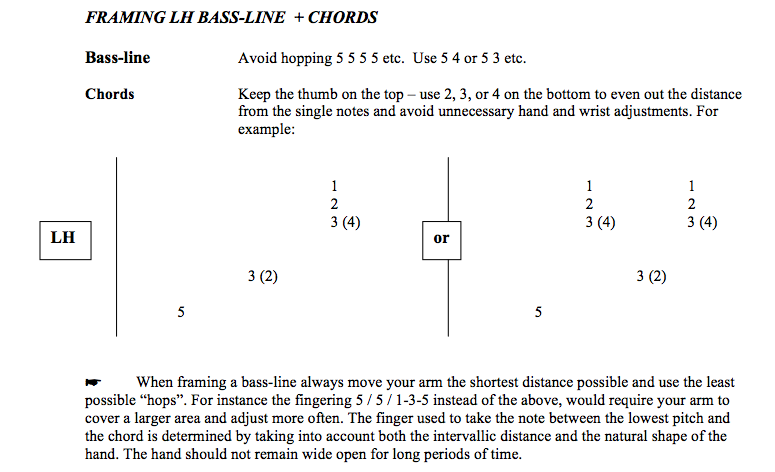
 After the first couple of weeks of lessons, the theme of our semester is clearly fingering. I went to dig out my handy-dandy handout from 2005 and decided to share it here with everybody. These are not meant as hard and fast rules, but as general guidelines to help transfer students who have developed questionable fingering habits make better choices. I have, on several occasions, found the need to tell students that if they kept up their old habits we were going to need to go to the ER to get their fingers surgically untangled.
Adjacent Patterns For melodic patterns or fragments using less than 5 notes choose fingers 1, 2, 3 rather than staying on the outside of the hand (4, 5). Major/minor Five Finger Patterns: use 1, 2, 3, 4, 5.
Extending adjacent patterns beyond five fingers is achieved by passing a finger over the thumb or passing the thumb under a finger. This is a motion natural and easy for the human hand. It is particularly important when a passage changes direction for just one or two notes. You should generally accomplish the passage with the fewest crosses. Be careful to allow your thumb to follow your second and third fingers so that the crossing is easy and natural.
Chromatic 3 on black keys / 1 on white / 2 when two white in a row
Diatonic Major/ Harm Min Never skip fingers or put your thumb on a black key in a diatonic scale. In some instances you may need to do this in a musical passage but it usually isn’t the first choice.
White Keys C D E G 3+4 / 4+3
B, Db, Gb 1 on white / 2 3 on 2 black groups / 234 on 3 black key groups
F Same pattern of grouped 234 / 23 / separated by thumb – the 234 & 23 fall on white keys or white + black
Ab Eb Bb Rogue Keys! One hand follows above rules the other puts 2, 3 or 4 in the “wrong” place
When other options aren’t workable a legato effect can sometimes be achieved in two ways. First, by the substitution of one finger for another. This can be very effective when several voices need to be managed within a single hand. Repeated notes are primary candidates for substitution. Second, by the careful use of small amounts of pedal.
Blocked/Broken 3 & 4 Note Chords
3 Note Major / Minor
Root Position 1 3 5
First Inversion 1 2 5 (RH) 1 3 5 (LH)
Second Inversion 1 2 5 (LH) 1 3 5 (RH)
4 Notes
1235 or 1245 (fingerings should fit the natural spaces of the hand: for example, don’t stretch 2-3 over a third or fourth when 2-4 will do)
While there are many alternates, basic fingerings remain the same whether the chords are blocked or broken (arpeggiated) and whether used as an accompaniment or part of the melodic structure. When arpeggiated patterns are extended beyond a single octave, the thumb is used as a pivot with 2, 3, or 4. Avoid putting the thumb on a black key in an arpeggio that has mixed black and white keys.
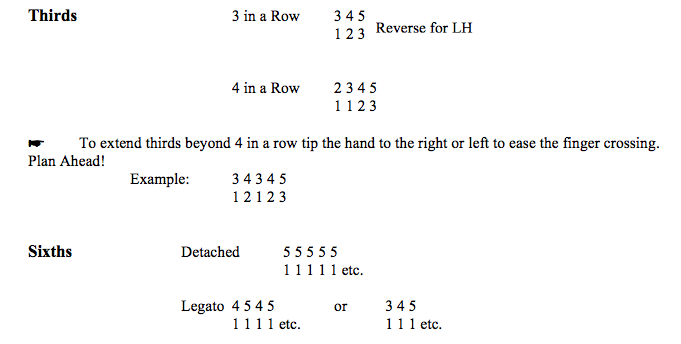
PARALLEL INTERVALS OF THIRDS AND SIXTHS WITHIN A SINGLE HAND


I would love for us to have a studio class about this. I don’t understand everything written here, but what if, you explained a principle and had a student sit at piano and demonstrate with your help? And then have another student do the next one, and so on…
Or, during private lessons, you could even assign each student to learn a certain rule and find an example of where it applies and then bring it to class. I realize it would probably have to after recital is over….